Introduction
To connect an application with Google Cloud resources, we need a Service Account. Service accounts allow you to assign an identity to an application and give that identity specific permissions, such as accessing for example to Google Cloud Translation API but not to Cloud Storage bucket.
Service account keys are similar to using passwords, allowing whoever holds them to act as the service account and access any service that the account has access to.
To visualize it with a daily example: If someone had the key to my house, they could enter without needing my authorization. While I could keep the key in a secure place, that location could still be vulnerable. To ensure security, I would need to rotate the location where I keep the key, and if possible, change the key periodically to avoid the problem of someone having copied it without my knowledge.
The same applies to an application. Unfortunately, there’s no way to verify whether the application holding the key is authorized to use it, and keeping the key in a safe place becomes a secret management problem.
The solution to this problem is Workload Identity Federation (WIF), which allows an application to replace the use of these non-expiring keys and verify the identity that wants to use the key. If the identification is successful instead of a key, a short-lived, one-time-use token is ussed, allowing the application to act as the service account and granting the necessary permissions.
Prerequisites
In this post, I’m going to show how to configure WIF with an AWS Lambda function. However, this can also be configured with any provider that supports OIDC here.
That being said, you will need to have:
- AWS account
- Lambda function
I will guide you through the google console, but all these steps are also possible through google CLI and you can find them in the official documentation.
Follow me through these simple 6 steps:
1. Permissions:
We need to have the appropriate permissions
- Project creator (Needed to create a project where the identity pool will be allocated)
- Organisation Administrator (Needed to modify two organisation policies)
After you create the project make sure that billing is enabled.
2. Enable APIs:
Go to your project and, in the APIs section, please enable the following APIs:
- IAM Service Account Credentials API
- Identity and Access Management (IAM) API
- Cloud Resource Manager
- Security Token Service API
You can enable them by clicking here
3. Create Service Account:
In the IAM and Admin section, create a Service Account
As basic rol we need to assign Workload Identity User and additionally provide the necessary permissions for the Google resources your application will access.
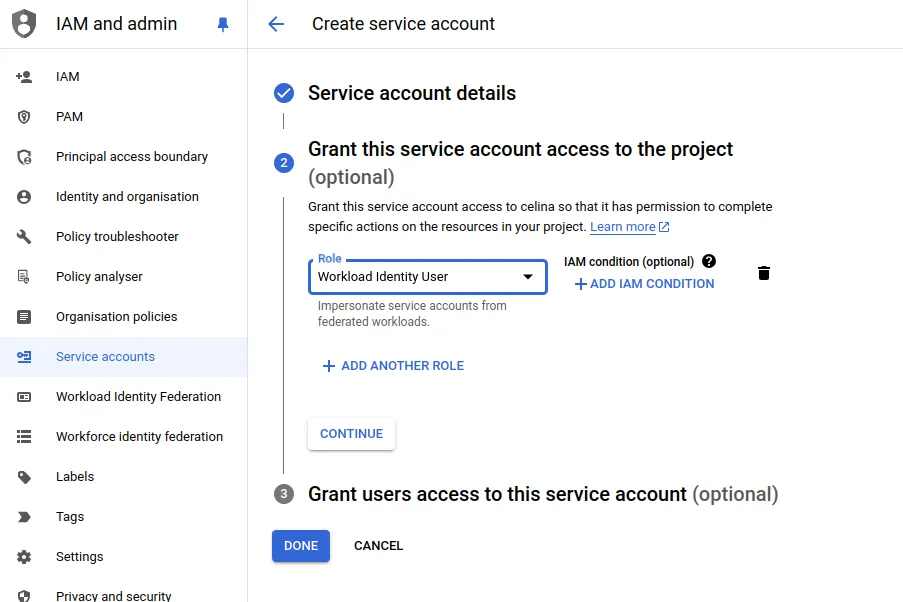
In this particular case I also added the following permissions:
resourcemanager.projects.getIamPolicy
resourcemanager.projects.setIamPolicy
4. Setting IAM Policies
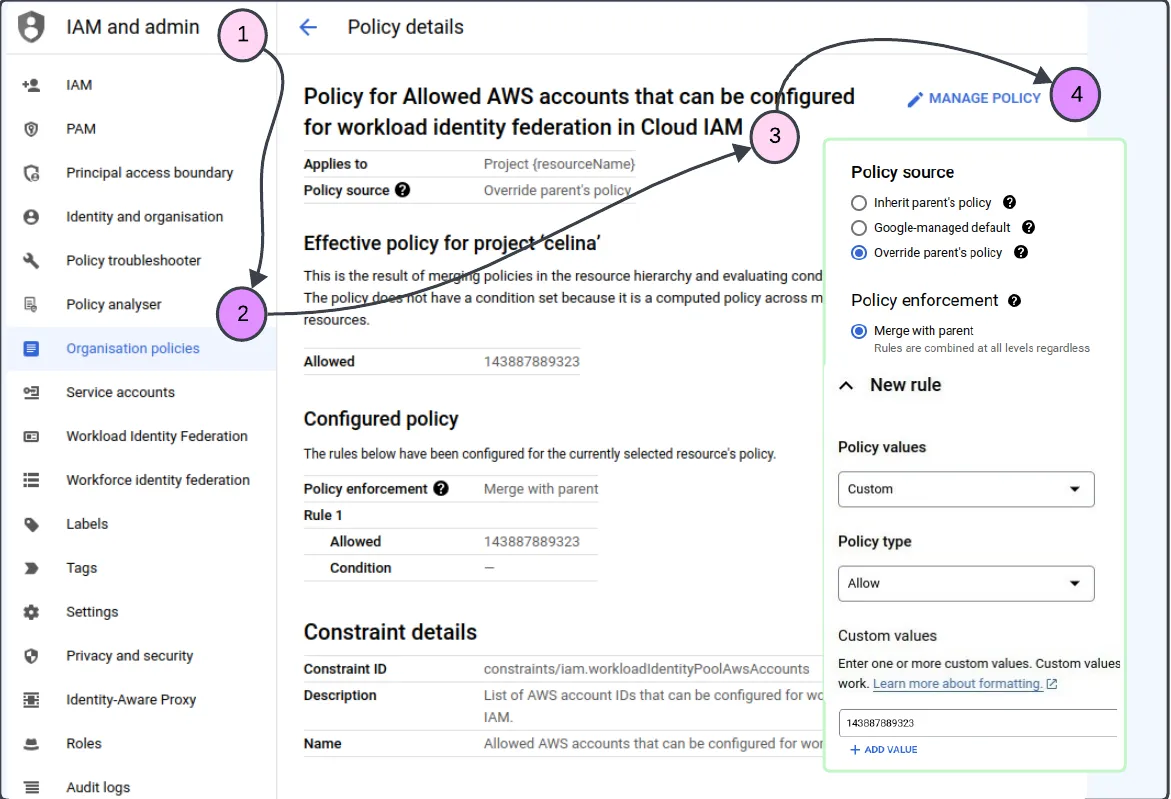
Also in the IAM and Admin section, look for Organization Policies tab and there for the following policies:
- Allowed AWS accounts that can be configured for workload identity federation in Cloud IAM
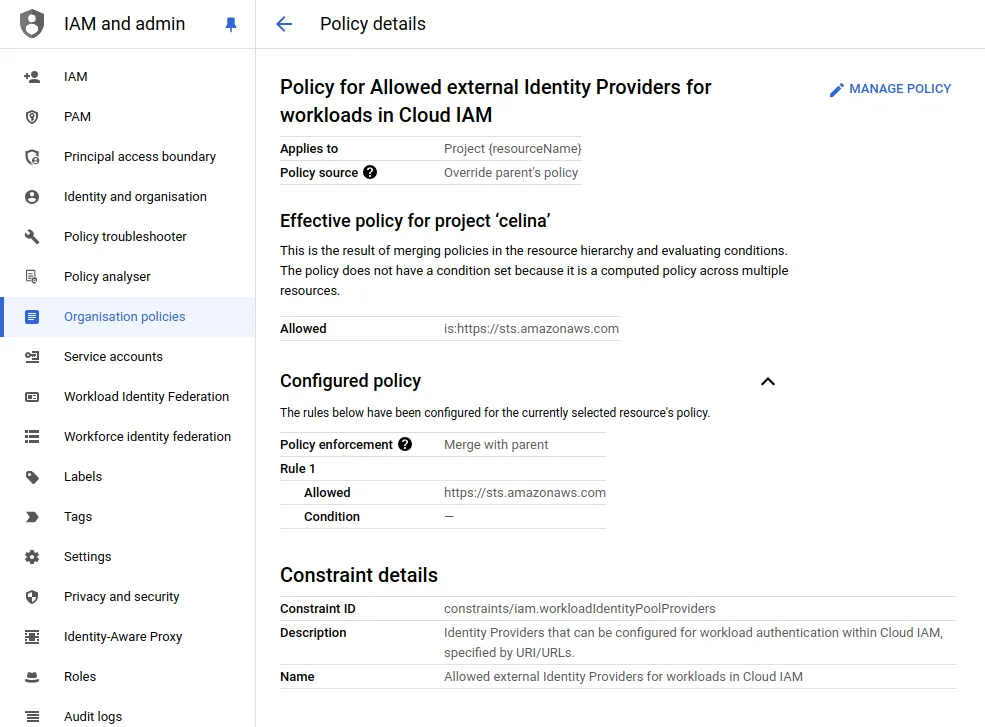
- Policy for Allowed external Identity Providers for workloads in Cloud IAM
You will need to provide in the first one the ID of the AWS account where your lambda is.
In the second one this value:
https://sts.amazonaws.com
5. Create Identity Pool
Going back to our analogy with the house keys, the identity pool would be the keyring that holds the house keys. The pool manages these keys/identities and these keys represent the different idenitty providers, in this case, AWS.
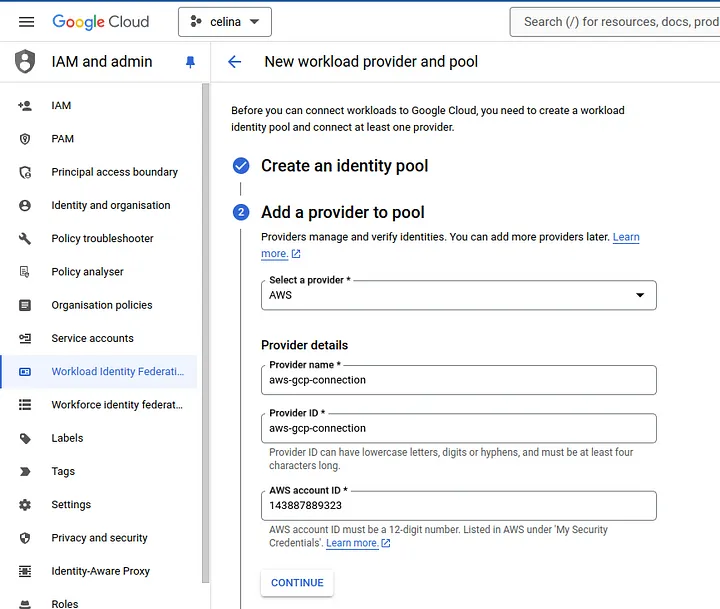
Next, we have the option to configure what we want to map from the token we receive from the provider, in this case, AWS STS (Security Token Service).
With Github could be for example the repository name, in aws certain iam role.
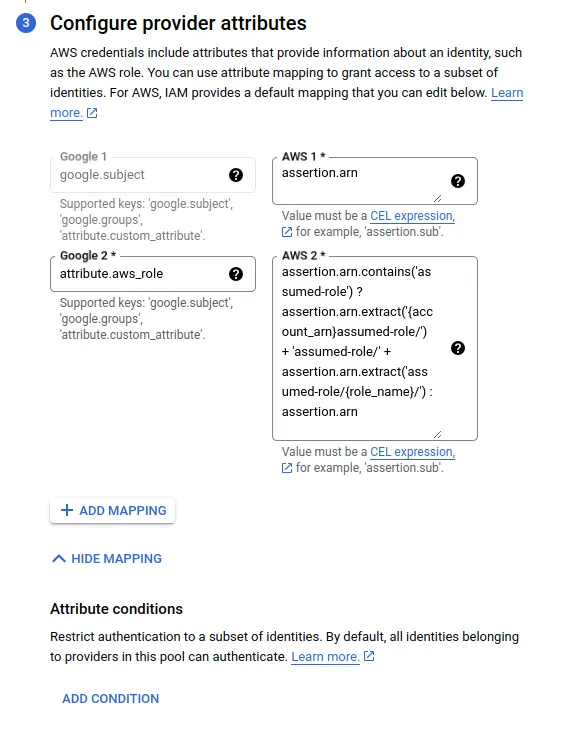
The mappings shown in the image are the default ones.
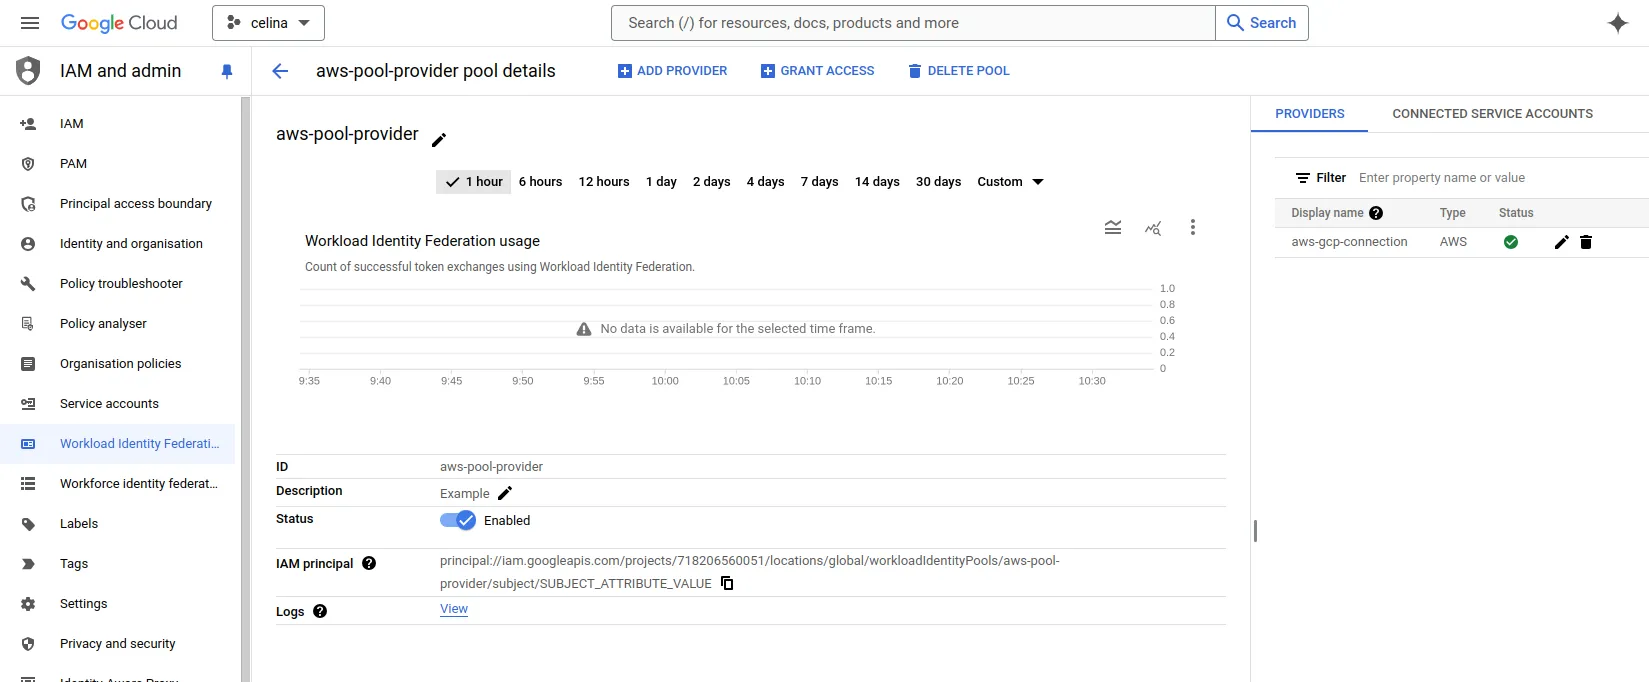
Once created our console will look like this:
6. Connecting your Lambda Function
To allow our lambda to have access to this token, we need to
Click on
Grant access- Then select
Grant access using service account impersonation - Select the service account previously created.
- In the
Select principals(identities that can access the service account) textarea write:
arn:aws:sts::[ACCOUNTD_ID]:assumed-role/[LAMBDA_ROLE_NAME]/[LAMBDA_NAME]- Then select
Save it, and in the modal that opens afterward, download the generated file and upload it into your Lambda function’s source folder.
And that’s it! In the Lambda code, we only need to set an environment variable named GOOGLE_APPLICATION_CREDENTIALS, with its value being the relative path to the file we downloaded in the previous step. documentation
As an example, the code of my lambda
const { ProjectsClient } = require("@google-cloud/resource-manager").v3;

process.env.GOOGLE_APPLICATION_CREDENTIALS = "./config-file.json";

const resourceManagerClient = new ProjectsClient();

exports.handler = async function (event) {
  const owner = event.input.employeeEmail;
  const policy = await getsProjectPolicy(event.projectId, owner);
  const resSetPolicy = await setNewPolicy(event.projectId, policy);
  return;
};

async function getsProjectPolicy(projectId, owner) {
  const [policy] = await resourceManagerClient.getIamPolicy({
    resource: `projects/${projectId}`,
  });
  policy.bindings = [
    {
      members: [`user:${owner}`],
      role: "roles/owner",
    },
  ];
  return policy;
}

async function setNewPolicy(projectId, policy) {
  const request = {
    resource: `projects/${projectId}`,
    policy,
  };
  const res = await resourceManagerClient.setIamPolicy(request);
  return res;
}
You did it! 🚀
Thank you for reading my post and following along with the process of setting up Workload Identity Federation. I hope this guide was helpful and gave you a clear understanding of how powerful WIF can be when integrated into your cloud application workflows.

